The Engine has landed
- jrwalton
- Jul 20, 2022
- 1 min read
Updated: May 11, 2023
Having fitted the rear differential and rear drives to the chassis and assembled the engine, clutch and gearbox we were ready for one of those big days. We had fitted the engine loom and taped it up out of the way. Cleared the garage of any rammel, moved the body out on to the drive to give plenty of room to manoeuvre the hoist.


Firstly we needed to remove the gear selector cover plate and gear shifter as there is not sufficient clearance. Also bolt on the mounting adaptor plates to either side of the engine. These stainless plates have a milled groove in them that is supposed to mate with the ridge on the mounting plates. However beware they don't quite match and I had to take the angle grinder to shave off a small amount of the ridge on the mounting plate to make it fit.


Connecting the gearbox drive to UJ and differential was relatively simply. With our diff we were supplied an adaptor plate with threaded holes. Not a flange with through bolts. But we did need a quick check with GD to clarify what bolts as this is taking all the engine output I didn't want to get the wrong specification. We went with Hex Bolt Full Thread UNF 3/8 x 1-1/4 inch in Grade 8 YZP Steel bolts - Loctite in place.


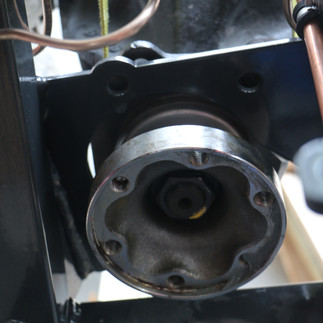
The gearbox is supported on a rubber bush with metal threaded inserts. Initially I thought the inserts had been supplied with no threads but then realised they were filled with rubber so needed to acquire a
7/16" UNC Tap, 14Tpi. That sorted things.


Here`s how it went..


Comentários